Follow the steps below to gather the information needed to complete the setup process.
Provide Tank Capacity
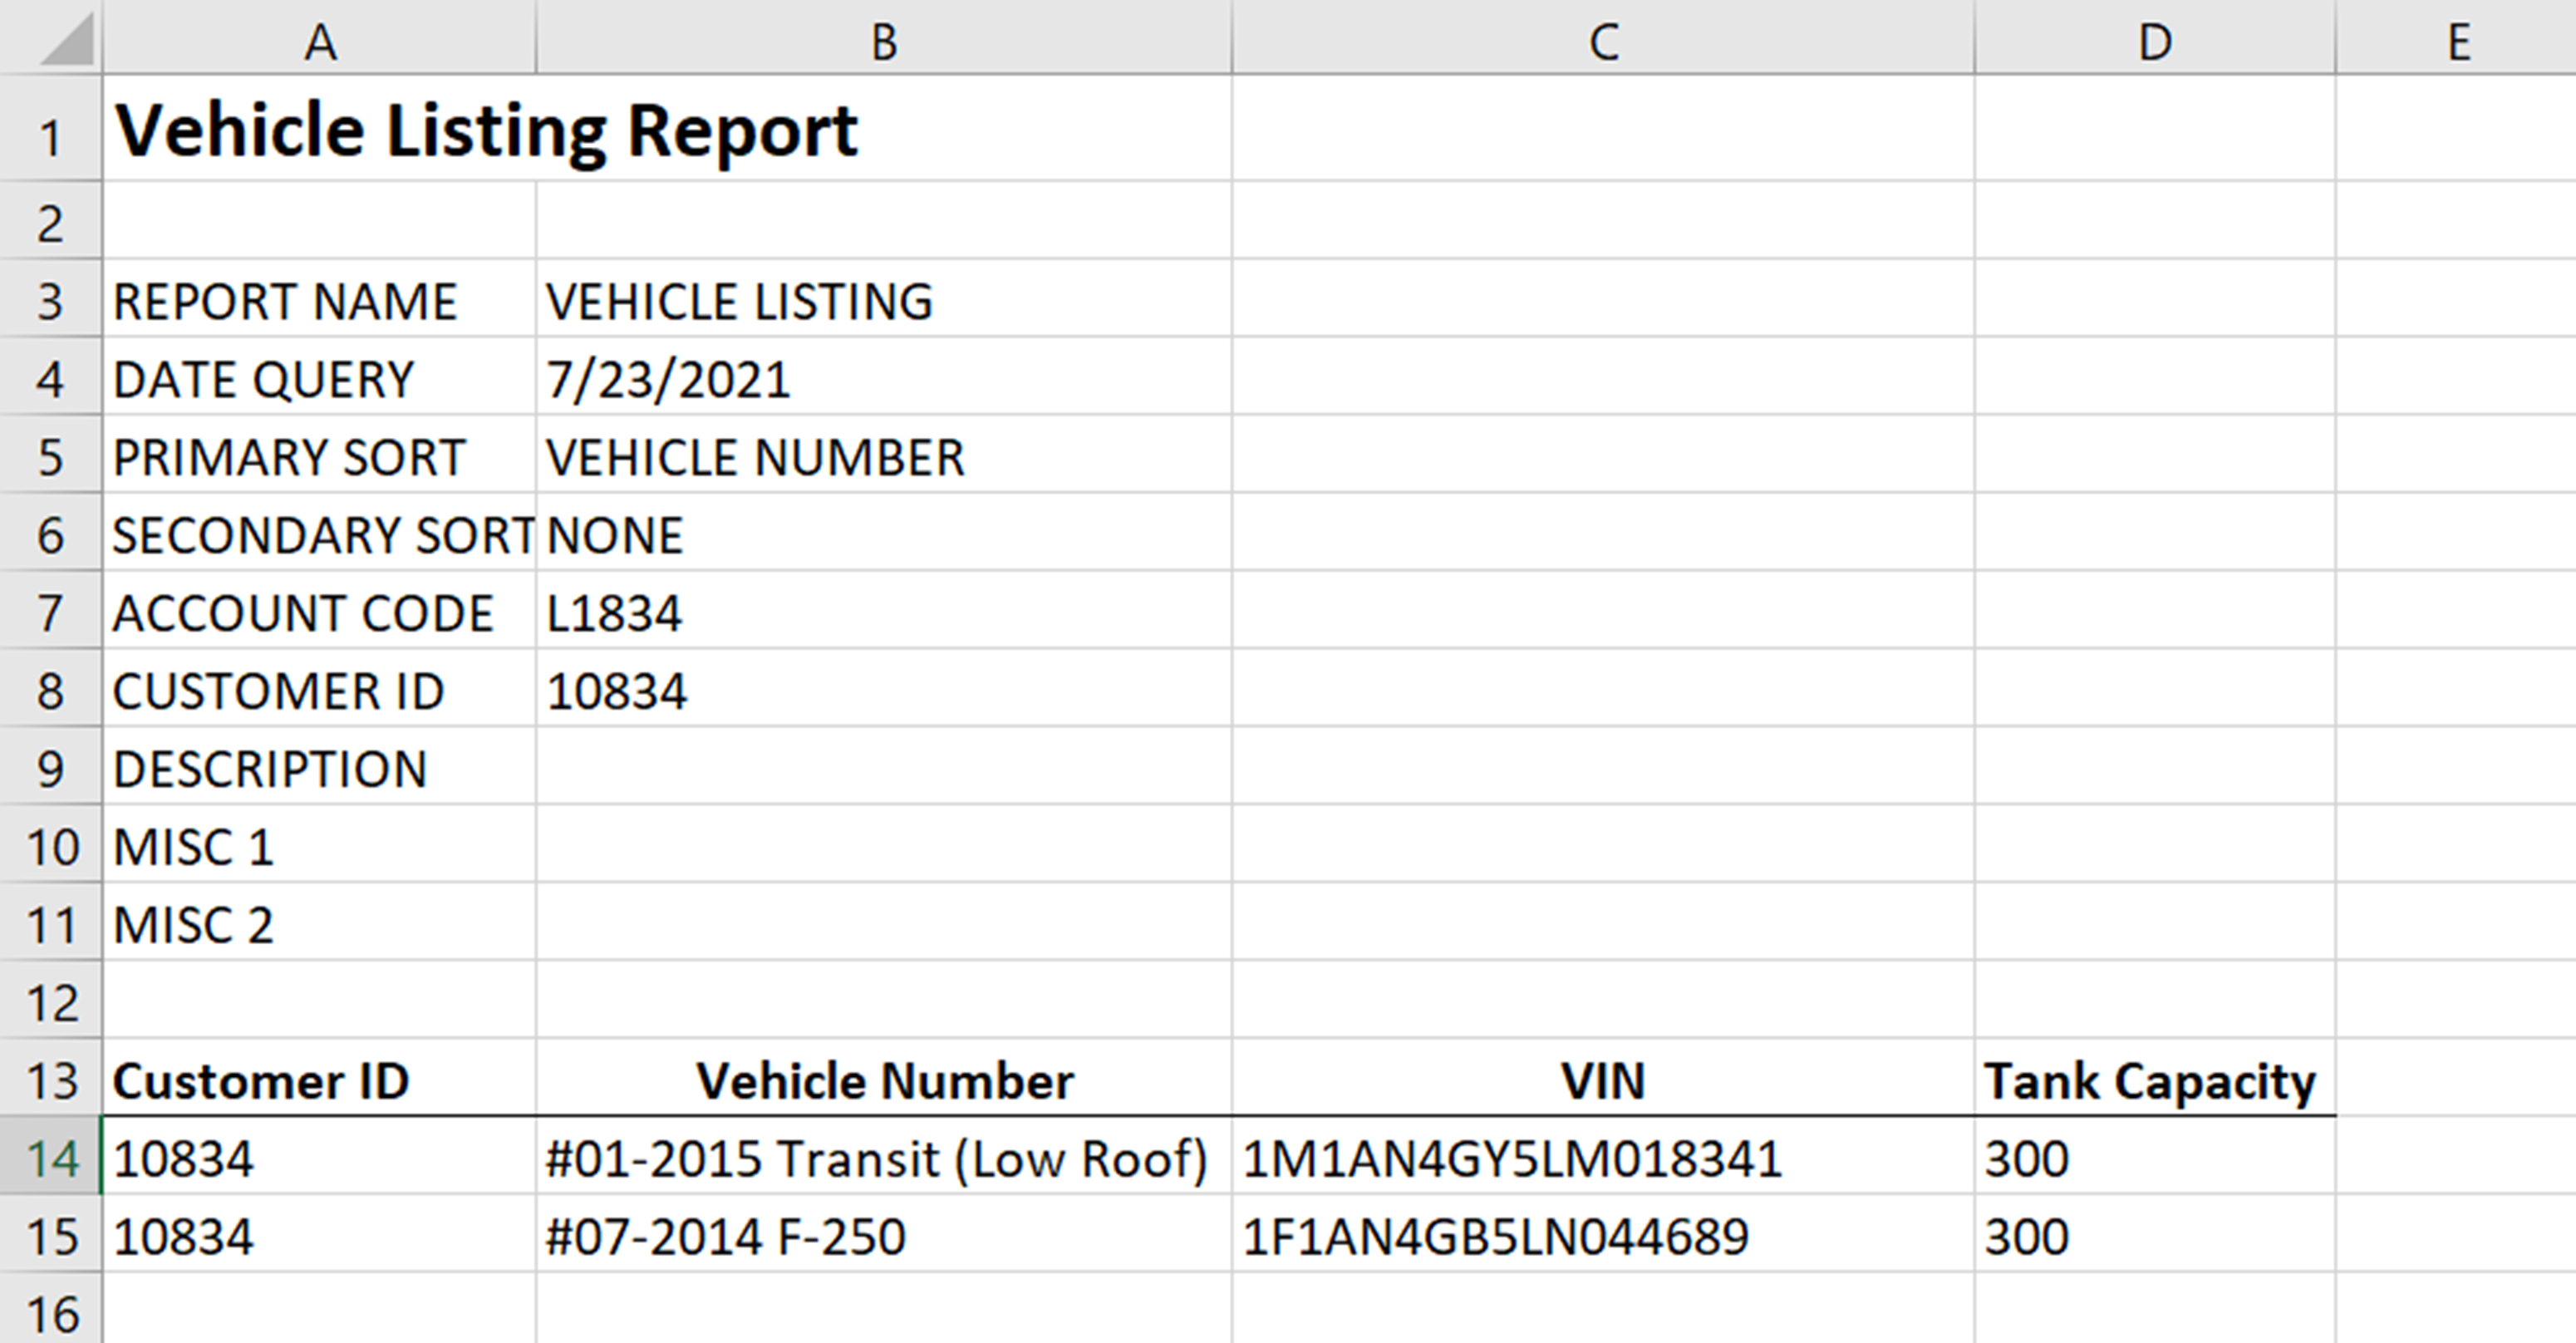
Within your Account Management website, go to ReportQ to run a Vehicle Listing report.
- Remove all columns except for the Customer ID, Vehicle Number, and VIN.
- Add a Tank Capacity column.
- Enter the tank capacity for each unit. This information can be obtained from your maintenance shop or Asset department.

When finished, save and email this modified report to your Account Manager.
Mapping to your Verizon Device
When pulling the Fleet Summary Report, keep it handy because when you are mapping your Device ID to its unit in ICD, you may need to reference the individual fields.
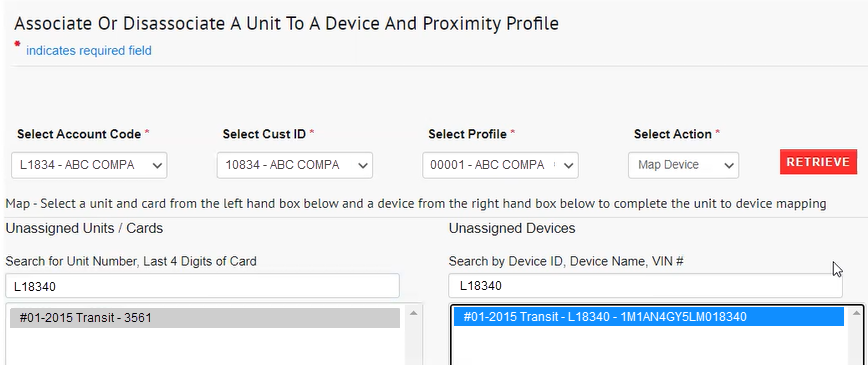
For example, you can see how the data is populated in the Unassigned Devices area.

Your report shows your vehicle device name will populate with the following Device naming convention (#__- ____ YEAR MAKE MODEL):

Here, we are looking for unit L10834 in our system to map the Verizon device #01-2015 Transit. Thus, viewing your Fleet Summary Report while mapping can significantly speed up the process, as well as providing your VIN.